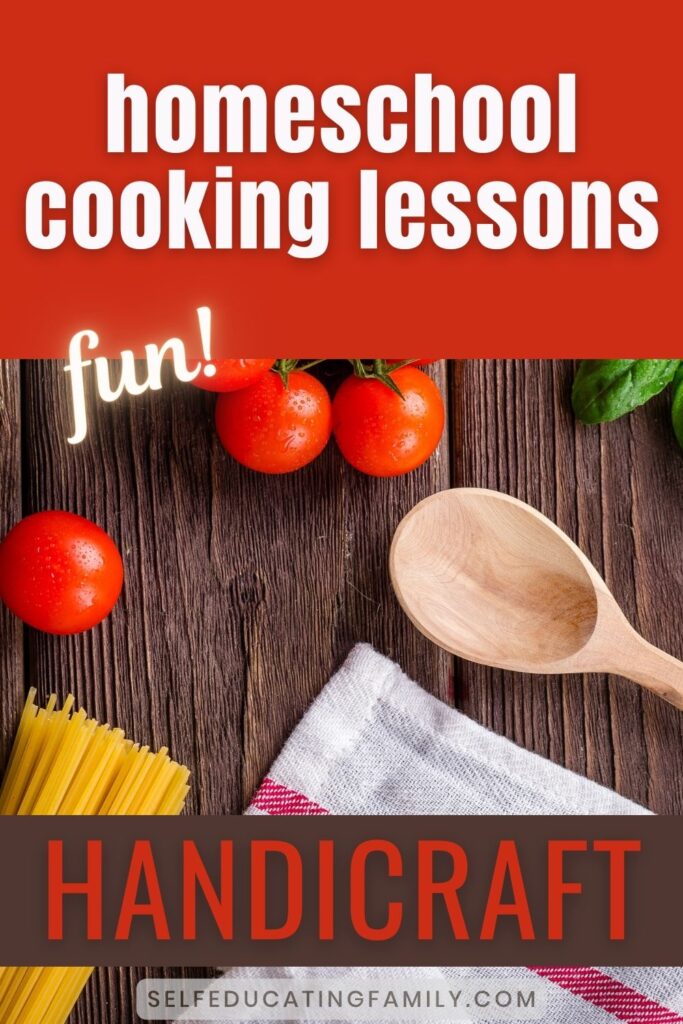
What’s Inside: Have you wondered how you can make “Teaching cooking skills to my kids” into practical handicraft lessons during your homeschool day so your kids can learn this vital life skill? This post gives you tips to incorporating the top basic cooking skills into a semester.
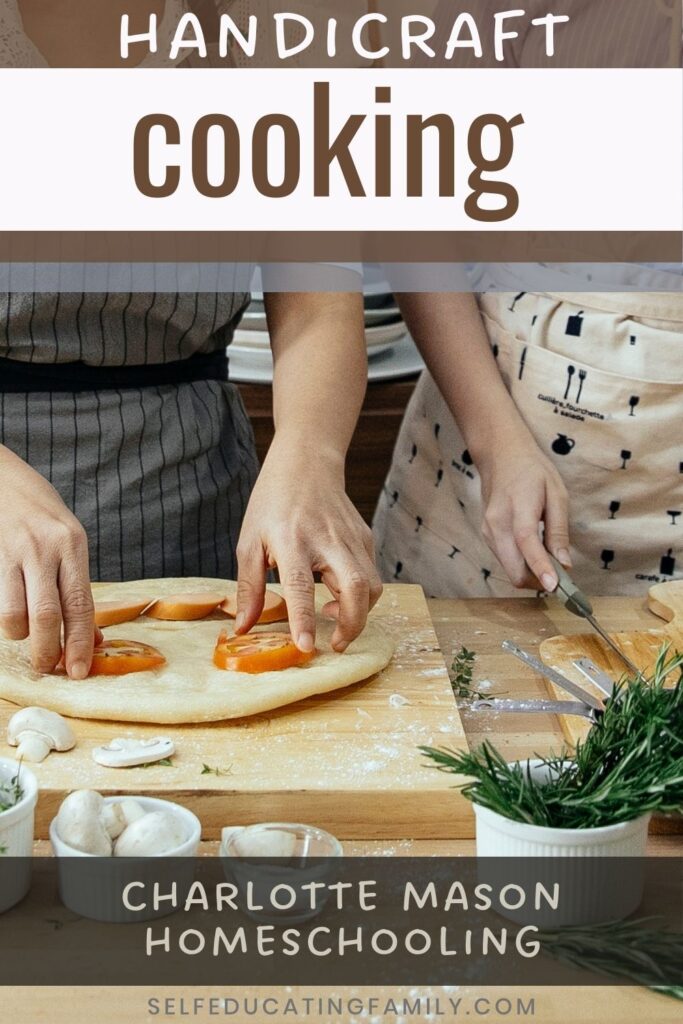
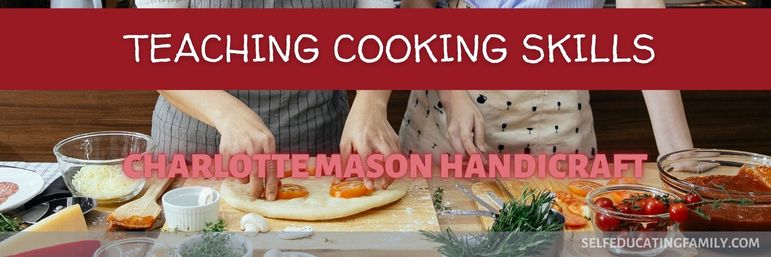
Teaching Cooking Skills to my kids
Teaching cooking skills to my kids? You may ask yourself, “How can I teach my kids the cooking skills they need?”
Here are some tips for incorporating cooking as handicraft into your homeschool day so that your kids can learn the life skills they need.
* This post may contain affiliate links. If you find my content valuable and make a purchase through one of my links, I will earn a commission at no cost to you, which helps me keep this blog going so I can help you even more! I recommend products I trust and/or use myself, and all opinions I express are my own. Read the full disclaimer here.
Top Skills to teach
I read a wonderful article by Chris over at Joybilee Farms on 6 Basic Skills that Make Cooking From Scratch Easier.
I would like to show you how you can select these 6 skills to teach your kids and plan a semester for cooking skills handicraft.
If YOU don’t have these skills, you can learn along with your kiddos or learn just ahead of them! We’ll talk about that more as we examine each skill.
6 Skills:
- Knife skills
- Dry Beans and whole grains
- Baking Bread from scratch
- Soup Stock & Sauces
- Meal Planning and Organization
- Making Condiments, Snacks, & Staples
Note on an Alternative Plan
I’m suggesting that you teach ALL of these skills over one semester and call it a “basic skills for cooking from scratch” handicraft.
However, you could easily pick any one of these 6 skills and do a whole semester on it, especially if your kids are already familiar with them. It’s a little harder to pick a “final project” to give away as a handmade kitchen gift, but you can get creative when you plan skill specific projects (below).
Our family always liked having a broad look at a category of handicraft and then moving into specifics when a child really liked the subject and wanted to go deeper. For instance, in our homeschool co-op, we did a broad overview class on “Food Preservation” and one of the kiddos loved the part on lacto-fermentation. That kid started learning more on her own during her handicraft time to really dive into the subject just after one exposure to the skill.
Overview Plan for 6 Basic Cooking Skills this Semester
- Spend 2 weeks on each of the 6 Skills for a 12-week semester.
- First week: Introduce the topic with a group activity
- Second week: Break out age-specific, skill-specific projects for each kiddo.
That will take you through a 12-week semester.
What does this actually look like?
Recommended Text
* Disclosure: This post contains affiliate links, meaning that if you purchase after clicking through, SelfEducatingFamily will receive a small commission at no extra cost to you.
While Chris recommends The Homemade Kitchen by Alana Chernila (which I just got out from the library and it is a fabulous book!), if you want a different book, I’d have to recommend Nourishing Traditions by Sally Fallon. Or if you want a book aimed for the kids, then try The Nourishing Traditions Cookbook for Children by Suzanne Gross & Sally Fallon.
These books can help you beef up your basic skills too, as your kids learn. The cookbook then becomes the textbook and the kids will select their own projects while using the book.
This brings up an excellent question…
What if I don’t have the Cooking Skills for Teaching My kids?
Let’s take a look at knife skills. Unless you’re an accomplished chef or have deliberately studied this, you may have just learned knife skills along the way. But did you learn the best way to cut, chop & dice? Do you know good ways to teach little kids knife safety in the kitchen? What age can a kid handle a knife without bloodshed?
This was THE thing holding me back when my kids were little.
Finally, we went to a cooking class of homeschooled kids (about 30 kids all wielding knives!) and the mom doing the class showed us great tricks. Most of the kids were using paring knives, which are pretty sharp, and we made vege spaghetti sauce, salad, and a dessert that we all shared after it was done cooking. No one got cut.
The next level of knife skills that we learned was by taking the Knife Skills Class by Katie at Kitchen Stewardship.
I highly recommend getting help in areas where you need help!
Tips
Note on Handicraft
- I’m calling this a handicraft, because first, you use your hands to make something useful, and second, Charlotte Mason built skills by doing a little bit at a time – never going too easy or too hard, but finding that sweet spot of “just challenging enough”.
Set aside time
- Designate a time each week to incorporate or practice a skill. Some families choose an hour, others make meal prep a family activity.
I’ve seen some families break it up into specific child “one-on-one” time.
The rule here is not a rule. Unless you count “Do what works for your family.” You may have to experiment to find what works.
But you need regular practice to build skills.
Plan your semester
- Consider the skills you want to teach over the next 3 months. Keep in mind who you are teaching and the level they are at. Consider projects that will increase each child’s skill set to the next level.
For instance, you can teach knife skills to the whole family, but you might be giving your toddler a wooden knife to “cut” butter while your high schooler learns to sharpen knives.
Include the whole family
- Include all your kids, even if they are not at the same level. Each time you broach a subject, they learn a little bit more, especially if you challenge them with specific skills and specific projects to complete.
For instance, if you are teaching them how to bake bread, the youngest can knead the dough and the oldest can make a sourdough starter from scratch to produce a loaf of artisan bread. Each level gets its own project.
- You can also get together with another family to “share” skills to teach to your kids. Maybe you are a fabulous baker and your homeschool buddy is a kitchen organizer & meal planner.
- The more kids you are managing in the kitchen, the more preparation you have to do. Take a look at how we managed over a dozen kids in a small kitchen when we were learning about dehydrating.
Specific Project Ideas for each of the 6 Skills
Here are ideas for the 2 weeks of handicraft in each of these 6 skill areas.
These ideas will be the starting point for various ages and levels. Your job is to sort out what each of your kids can do. And how you can safely manage all of them in the kitchen!
Remember, you can also just select one of these areas to work on for the whole semester – 12 weeks. See what you think will work for your family.
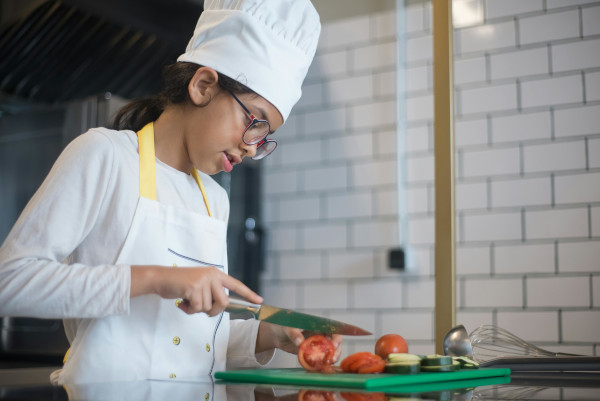
Knife Skills:
Week 1:
- Knife safety; Demo Chopping (Paring knife, Chef’s Knife) with Chopped Salad
- Kids select recipes for next week.
Week 2:
- Kids execute recipes selected last week.
Other options for full semester activities
- Knife Safety
- Kitchen Safety
- Chopping & Slicing: Great article with recommendations here.
- Bananas and butter knives with your pre-schoolers
- Paring knives and Pineapples
- Small Chef’s knives and cucumbers as your child gains skills
- Recipes as final projects: Get the kids to pick something within their skill set. Here are a few suggestions:
- Peanut butter toast with sliced bananas | Ahead of Thyme
- Fruit skewers snack | Dinner Dishes and Desserts
- Pizza toppings for DIY pizzas | Cool Mom Eats
- Chopped Salad | Simple Joy
- Guacamole | Downshiftology
- Fruit Salad
- Remember, once they can chop safely, they can help you with dinner or lunch prep or make their own snacks! Make sure they are chopping safely before you move them up to the next level of chopping.
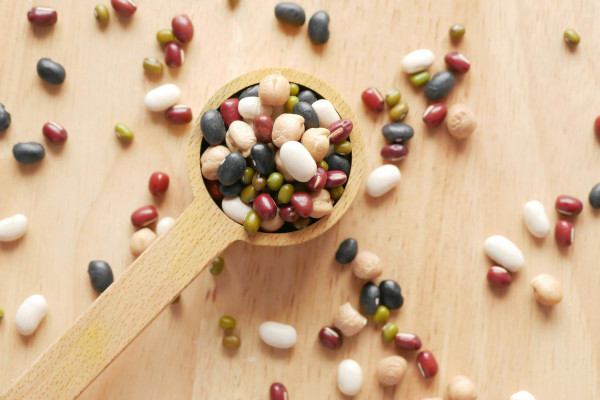
Dry Beans & Whole Grains:
Soaking overlaps with menu planning a bit since you have to soak overnight for the next day’s meal. Keep that in mind when introducing the topic.
Week 1:
- Why soak? Discussion
- Demo: Soaking beans for chili & soaking grains for overnight oatmeal
- Select recipes for next week
Week 2:
- Kids execute recipes selected.
Other options:
- Benefits of Soaking/ Nutrition, cost & health | Pick Up Limes
- How to soak beans, grains & nuts | Cultured Food Life
- Make Beans for dinner | Kitchen Stewardship
- Make Rice, CousCous or Polenta to go with dinner | Traditional Cooking School
- Recipe: Make Overnight Oats in a Jar for breakfast | Chocolate Covered Katie
- Recipe: Hummus | Heartful Table
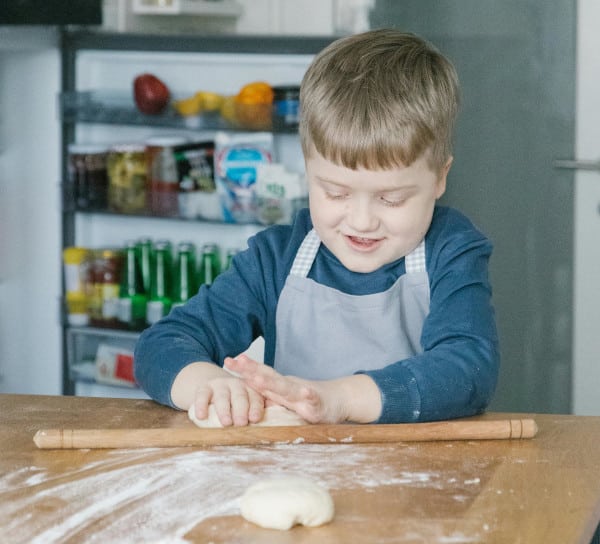
Baking Bread:
Week 1:
- Demo making a loaf of bread. Hand kneading if possible. Once someone gets a knack for what a dough should feel like, then they can use a bread machine or a stand mixer for kneading.
- Select recipes for next week
Week 2:
- Kids execute recipes selected.

Other options & tips:
Tip: Start where you are.
- If you are a full-fledged bread-baker, then start teaching your kids the skills you already have.
- If you have sourdough, start there.
- If you have never made anything scratch, start with a fresh or frozen pizza dough and make a pizza for dinner.
- You can also use fresh pizza dough to make excellent cinnamon buns.
- Work your way up to making the pizza dough yourself with active dry yeast.
- If you know how to make yeast breads, make pizza. Very kid-friendly and one of the easiest recipes. Here’s my friend Jane’s recipe. You can start it in the morning and it can be ready for lunch. I use a Kitchen-Aid mixer for my bread doughs.
- If you have a bread machine, it is easy-peasy to throw together a “from scratch” bread dough.
- A great book of recipes is The Breadman’s Healthy Bread Book. I love his baguette recipes.
- Teach the kids the easiest recipes first, like baguettes which only use flour, water & yeast. Sometimes salt.
TIPS
- Tip! Kneading the dough by hand is one of the most satisfying sensory experiences. And it’s important to know what the dough should feel like, so you can build your skills to artisan breads.
- Another Tip! If your kid goes nuts about making yeasted breads, you can usually get a bread maker for under $10 at a thrift store. Do this after you feel they have kneaded by hand enough! But you could conceivably have homemade bread all the time with very little effort if your kiddo likes this option.
- I only switched away from a bread machine to the Kitchen-aid mixer because the artisan breads really want a different shape than a bread maker can do. This gets their crusts properly cooked. But I like the convenience of having the machine mix for me.
- If you are feeling ambitious, make a sourdough starter.
- Buying a starter can be a more reliable way to start than getting yeast from the air. Azure Standard sells an actual jar of starter as well as freeze-dried kits to start. Another reliable company is Cultures for Health.
- Of course, borrowing an extra starter from someone who has one is even better.
- If you already have a sourdough going, then you no doubt have your favorite recipes that you just have to make time to demonstrate.
- Pick 5 or 6 easy, fun recipes that you think will best illustrate bread baking for your kids. Be sure to challenge your older kids because they will go faster than you think.
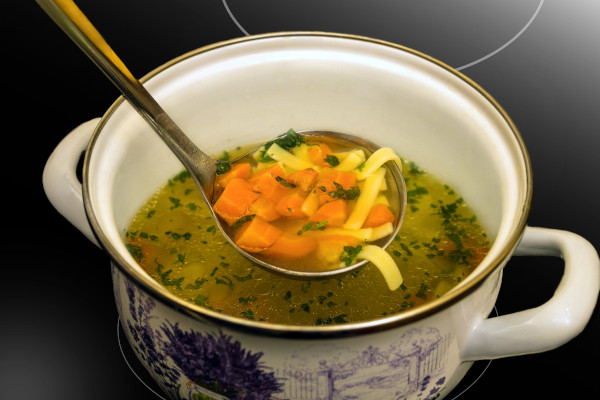
Soup Stock & Sauces:
Stocks and sauces are the basis of learning to cook real food. If you know how to make great stock, you can make great sauces & gravies. First teach how to make a good stock, then soups, gravies & sauces.
Note: You can freeze stock in large 1 QT yogurt containers as long as you don’t overfill – remember water expands as it freezes. Simply thaw and use when needed. I actually pressure can my stock so that it is shelf stable – but that’s another post!
Week 1:
- Demo how to make chicken stock from bones or a whole chicken.
- Demo how to make a gravy using stock as the liquid.
- Select recipes for next week.
Week 2:
- Kids execute recipes selected.
Other options & tips:
Obviously, you should choose the favorites that your family loves, but if you don’t know where to start, here are some suggestions.
- Stock
- Slow cooker bone broth | Nourished Kitchen
- Chicken soup and stock | Nourishing Traditions recipe in my planning app
- Soup for Breakfast | Phoenix Helix
- Note: You can also teach beef, fish, or vegetable stock!
- Soups & Stews that use stock
- Roman Lentil Stew | from my planning app
- Roasted Cauliflower & Garlic Soup | Cooking with Curls
- Roasted Butternut Squash Soup | Love & Lemons
- French Onion Soup | Simply Recipes
- Sauces & Gravies
- Roasted Chicken & Gravy | from my planning app
- Poutine with Bone Broth Gravy | Glazed and Enthused
- 5 minute Gravy | Raising Generation Nourished
- Beef Shanks with Vietnamese Spiced Glaze | Gutsy by Nature
- Three sauces to use bone broth in | She Knows

Meal Planning & Organization
So here is my weak spot! I have a hard time in this area. But you are in luck because I will refer you to my sources, but basically you want to share how you:
- plan meals
- make shopping lists
- keep track of what’s in your pantry
- keep track of leftovers & how you reuse them
- store/organize what is in your pantry
- keep track of your recipes
- keep your refrigerator organized
I threw in that last one because I thought you could get your kids to help you clean the fridge! When we tried that, it didn’t go over well.
Suggestions
To organize, some people use a “home management binder” or an online app. I have both paper recipes (called cookbooks) and an online app called Plan To Eat that I’ve used for years, which I love. It plans meals, tracks ingredients, and makes a shopping list (which I rarely use). Check it out. If it’s Black Friday weekend, their subscription goes on sale for 50% off usually. And if you do join, drop me a note and I can “Friend” you.
Shopping and organizing depend on your style too. We like to shop the sales and then plan the meals. It’s probably not the most efficient way, but it works for us. I think it works because our pantry is well-stocked. We usually don’t run out of baking powder or cocoa, for instance.
Anyway, if you are good at this, don’t assume your kids will be too – share your skills with them. Even if they can’t do it as well as you can. Everyone has to start somewhere.
We had our kids each plan and execute an entire theme meal – from menu to shopping and cooking (with supervision). Give them a free hand, but be prepared to steer – I made the mistake of a too open-ended menu selection and one of my sons chose the most elaborate meal ever devised! It was a 3-day prep for this meal! It did end up delicious, but still!
Week 1:
- Show most aspects of your planning and management
- Kids select a meal for next week, plan it, and make a shopping list.
Week 2:
- Kids shop & execute their meal plan.
Making Condiments, Snacks & Staples
Week 1:
- Demo making mayonnaise and using it in deviled eggs or tuna salad. Demo salad dressing and use it in a salad that night.
- Select recipes for next week.
Week 2:
- Kids execute the recipes selected.
Other options & tips:
- Condiments
- Mayonnaise from scratch
- Fermented Ketchup
- 2 or 3 basic Salad dressings
- Snacks
- DIY Lara Bars
- Hummus & veggies
- Smoothies
- Apple Rings
- Pantry Staples to DIY at home
- Vanilla extract
- Cake Mixes
- Cookie Mix in a Jar
- Cornbread Mix
- Almond milk | The Rising Spoon
- Electrolyte drink | Raising Generation Nourished
- Tallow | The Prairie Homestead
- Rendered duck fat | Honest Food
- Spice Mixes (like taco mix)
Whew!
Now you have a plan to teach your kids how to cook! It covers basic cooking skills and should answer your question about “teaching cooking skills to my kids!”
Keep on Learning!
Related Posts:


Recommended Books:
- The Homemade Kitchen by Alana Chernila
- Nourishing Traditions by Sally Fallon.
- The Nourishing Traditions Cookbook for Children
Recommended Courses:
- Free Knife Skills Class by Katie at Kitchen Stewardship
- Cooking Curriculum for the Whole Family also by Katie at Kitchen Stewardship
Still More Resources!
I couldn’t fit all the additional resources I found for this post, so they are all included in the post Teach Kids to Cook: Roundup of Resources.
Need more tips?
Discover easy ways to add purpose, thinking skills and real life skills at the Life Skills Leadership Summit now available as a VIP Pass for your lifetime access.
By the way, I gave two workshops at the summit so be sure to watch for me!
Grab your VIP Pass here and you’ll get all sorts of real, PRACTICAL advice from 30+ expert homeschoolers, 50+ workshops, $600+ in Swag, the exclusive Private Podcast recordings, plus special bonus Bundles.