What’s Inside: Cookie mix in a jar means layering dry ingredients of a baked goods recipe into a mason jar, then putting a pretty ribbon and label on the jar and giving it as a homemade gift. This simple craft is wonderful fun for your homeschooling day! Get everyone involved in this handicraft lesson!
Cookie Mix in a Jar
Handicrafting some homemade goodness
Cookie mix in a jar can be handicraft? How does THAT work?
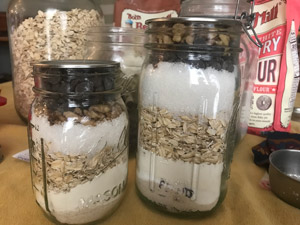
To be clear, we are talking about layering dry ingredients of baked goods into a mason jar, then putting a pretty ribbon and label on the jar and giving it as a homemade gift. Pretty simple, right?
Simple, but elegant

Most people love to receive a handmade jar of cookies from a child. Picture Grandma saying, “Oh, how lovely! Do you want to make them with me?”
Yes, I think making gift jars of cookie or brownie mix can be a great handicraft to work on. You can do this by yourself, with your family or with a large group of kids.
Why would this “count” as handicraft?
Handicraft refers to teaching children to make useful things by hand. I’m using a very broad definition here.
Our homeschooling co-op selected “Food Preservation” as an overall arching subject to pursue for a semester. We fermented, dehydrated, and made some cookie mixes for the pantry. In a different homeschool group, we hosted a table to make cookie mix at the annual DIY gift fair (in which you make the gifts that day.)
You have to agree that a cookie mix is made by hand, and I think baked mixes in a jar are extremely useful. So it fits our wide definition of handicraft for the moment.
If you or your child finishes the jar using careful work, you can learn to have fun while producing a beautiful gift. So it fits Charlotte Mason’s idea of handicraft, albeit loosely.
What skills could I possibly learn?
This handicraft is especially good for little people. It can teach careful measurement of dry ingredients and assembling a layered jar neatly.
But yes, if you know how to cook, the learning lessons may be limited. So share your knowledge and teach someone who doesn’t know how to do this. This can be a fun activity for a mom’s night in if you don’t have kiddos to teach.
Beginning cooking skills
Beginner cooks of any age can learn some basic cooking skills. Measuring ingredients – do they know the “dip, level, pour” method for dry ingredients?
I had to look this up to see if it is still a thing – I learned “Dip, level, pour” in a high school cooking class. Given the woeful state of people who don’t know how to cook today, it’s a good idea to make sure you cover the basics well.
Reading a recipe
You’d think anyone could do this, but again, young people aren’t learning some very basic basics. For that matter, math in the kitchen is a great skill. Did you know that only 53% of millennials know how many teaspoons are in a tablespoon? see references at bottom.
Additional baking skills
If you follow through with actually testing one of your jars – you know, baking one of the mixes during your assembly party—then you can add kitchen safety, mixing and simple baking skills. And, if you can, you should go ahead and bake a jar during the assembly class – it is a huge motivator for new learners to taste their product.
Gift Making
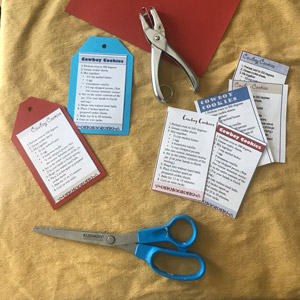
Once the jars are sealed, decorating the jar takes over. Here is where some creativity comes into play. If you are running a class, you would need to have the labels and materials prepared ahead of time. But you can make a variety of choices for the gift maker to select from.
Rubber band with ribbon, hemp, or baker’s twine is good for tying instructions onto the jar. Some people like to hole-punch and hand-print the labels. You can also add a personalized gift tag in addition to the instructions tag.
Length of the lesson – Do you have time for two sessions?
Alternatively, you could split the class into two sessions where you make all the labels and cut materials for the top first, and then do the assembling of the jars in the second part of the class.
Using two sessions is worthwhile if your emphasis is on some of the skills needed for packaging the jar, like papercrafting or calligraphy, if you are hand printing labels and gift tags.
TIP: Don’t assemble the jars without having the finishing touches prepared– the labels, ribbons, and tags – you will lose momentum, and it isn’t as much fun.
How to run a class
I’ve taught a wide range of kids to make “cookie mix in a jar” – from individual kids to a group of over 90 kids ranging in age from toddlers (with assistance from their mammas) to teens. Most everyone approves of this craft since the result is an edible future creation.
Kid-friendly
If you are doing this with a larger number of kids, make it as kid friendly as possible. Think it through – how many kids, what ages? What skill level? How will the kids move from ingredient to ingredient? Is there enough room? What do they do while waiting? No one likes to wait in line with nothing to do.
Some things have to go in order, but some things don’t. If you are doing assembly and decoration prep concurrently, you can start half the group in each area, but you risk losing momentum. To counter that, you can have the decorations group doing generic tasks, like cutting out cloth circles or labels, and skip any real personalization on the labels.
You will want to keep safety as a priority with kids – including food safety. Where is your sink for washing hands? How will you keep little kids from eating or touching stuff uncontrollably?
Assembly line
Regardless of who or how many are doing this at once, assembly line works best.
In the kitchen, setting out all the stuff you need is called “mis en place”. It’s essential for making a productive experience. In fact, you can teach that as a part of your class if your students would appreciate the knowledge.
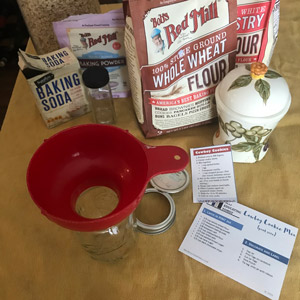
You will want to set out all materials, ingredients and tools in an appropriate order. Your recipe will suggest the ingredient order.
Order of Assembly Line
Practice making one jar from the recipe before you run a class with more than one person. Set up your “mis en place”.
- Jars (without tops)
Ingredients:
- Each ingredient needs:
- Measuring tool
- Funnel
- Tamper (to smush down the ingredient for a neater look to the jar)
- Cheat sheet (optional – very useful if you are teaching a large group)
Note for large groups: You will need additional space for restocking your ingredient when you run out of it. For instance, we had 90 kids go through the Cowboy Cookie mix in a pint jar recipe. That’s a total of 60 cups of oats we went through. That’s almost 12 pounds! We couldn’t keep all 60 cups out on the table, so we grabbed the next container as needed.
Repeat for all ingredients.
Capping Station (all items ready ahead of time)
- Tops to the mason jars
- Ribbons, hemp or baker’s twine
- Cut out circles of colorful cloth
- Rubber bands
- Labels
Alternate Capping Station
(for splitting a group or for a separate session where you make the labels and decorations)
- Tops to the mason jars
- Ribbons, hemp or baker’s twine
- Material for top
- 6” Circle templates
- Scissors
- Pre-printed labels
- Cutters
- Markers or pens for additional customization of labels
What to do with a jar of mix?
In addition to using homemade mixes as gifts, you can easily use them as quick homemade mixes for your pantry. If I am making a batch of muffins, for instance, I will usually make a “double” recipe by making one in the bowl and putting the dry ingredients for the double into a mason jar. Then it’s there for a quick start for breakfast some days.
But I won’t put a pretty cloth cover on it! Sometimes, I forget to label it at all. I do NOT recommend this!
What kinds of recipes work well in a jar?
Baked goods work really well. Most muffin recipes will take a quart size jar. Cookies, also. You can make a half-recipe to fit a pint jar. Simply layer the dry ingredients in the jar.
If you are using it as a gift, you will need to “pack” the jar to the top so the layers don’t mix. You can do this with “add-ins”.
Add-ins that store well in the jar:
- Nuts
- Chips
- Candies (like M&M type if you go for the high sugar content)
- Dried fruit can work too. Higher moisture items don’t store as well in a mix, so put an “expiration” date on your label.
- If you are using packed brown sugar, it can have the same problem. Drying out can make it get “stuck” like a big rock in the middle of your jar!
“Early bird gets the worm. But cookie taste better than worm. So me sleep in.”
Cookie Monster, The Joy of Cookies: Cookie Monster’s Guide to Life
Sample recipes
I’ve got 2 recipes for you, with free printable labels.
Incidentally, I sometimes buy my bulk flour at Azure Standard. You can read my review here.
Final Tip: Label your Jar
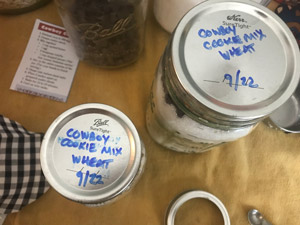
Date and label your jar. Even if it never gets used as a gift, or if it somehow gets separated from its instructions, you can know how old the jar is and what’s in it.
When I make muffin mix for myself, I sometimes forget to label which recipe is in the jar. Don’t make the mistake of thinking you will remember! It’s like when you are starting seedlings. You will have no idea what you put in that dirt.
Label, label, label! Or scrawl on the top of the jar. Especially if you used gluten-free flour (or did you use regular?) You won’t remember!
And a final funny story about dating your jars
Remember the idyllic gift to Grandma?
Well, we did that, only my kiddos never got the chance to bake with Grandma on that visit. I found the jar stuffed in the back of a cabinet about 8 years later. Talk about rock hard brown sugar! I don’t think the chocolate chips even were still good. Though my boys wanted to eat them anyway.
When in doubt, throw it out!
Or remember to label!
For more information:
- Mis en place by the great Julia Child
- Ideas for Cookie recipes