Woodworking skills: Seed Starting Shelf
I’ve just completed my new seed starting shelf. It’s a woodworking project that was supposed to take an afternoon, it took me a week of afternoons. This post will share my agonies with you to inspire you to go out there and try new things – like listening to the blues to cheer yourself up. Use these tips when learning woodworking or choosing your next woodworking project for handicraft.
This post may contain affiliate links. If you find my content valuable and make a purchase through one of my links, I will earn a commission at no cost to you, which helps me keep this blog going so I can help you even more! I recommend products I trust and/or use myself, and all opinions I express are my own. Read the full disclaimer here.
Why am I building a seed starting shelf?
To grow more plants inexpensively! Everyone needs to get out there this summer and grow local – backyards if you have one. Community gardens if you don’t, or if you are an apartment dweller, grow some microgreens or use patio container gardens! Children need a connection to their food and to gardening.
Cost analysis: To buy one “starter plant,” like a tomato in May, will cost you probably $3.59. Maybe more this summer with increasing prices. But buy a pack of seeds, and it might cost you the same. And each packet of seeds can grow dozens of plants. And each plant can produce 10 – 30 lbs of tomatoes. A pound of organic tomatoes at the supermarket can cost $4 a pound.
Tips for what to grow: Grow things you like to eat. Additionally, if you are pressed for space, grow the most value for your dollar. A great book to show value is High-Value Veggies by Mel Bartholomew (Square Foot Gardening Guru). If you’ve never done it before, start small. Give your child their own 3’x3’SFG to take charge of.
Incidentally, we’ve been growing from seedlings for a number of years, with more success in some years than others.
So why do I need a new seed starting shelf?
We’ve gradually upgraded our seed starting over the years. I think my boys made a fantastic light box one year when they were young. It was a foil-lined cardboard box with a light bulb inside it. So simple, but apparently a fire hazard, so you can’t find any demos of it anymore. It worked superbly. I think I used it for a few years, then outgrew it as my seed-starting needs grew.
So I shifted to a 3-shelf design with tips from Tenth Acre Farm (Amy is the author of The Suburban Micro-Farm).
Her big tips include:
- Use ordinary shop lights if you have them with full spectrum bulbs. (I actually use 1 cool and 1 warm bulb in each shop light for the same effect).
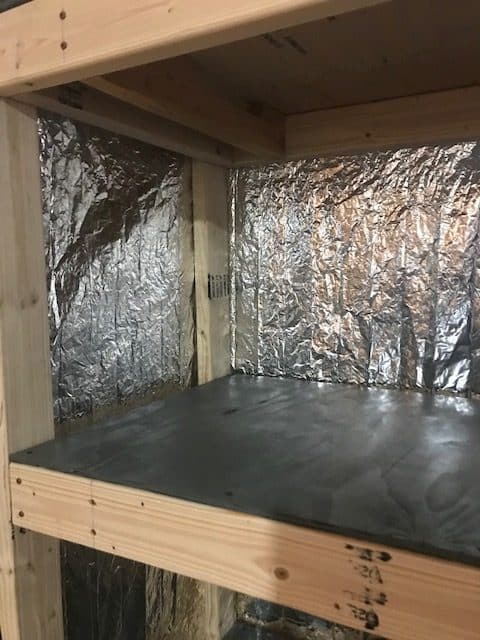
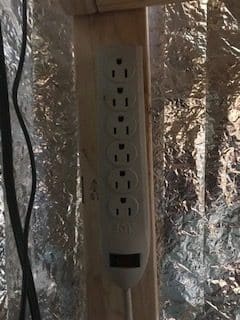
- Surround your shelves with reflective surfaces (like lining the cardboard box with foil – I use those thin emergency thermal blankets which work great).
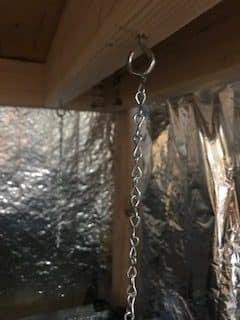
- Set it up to raise and lower the lights as needed – you need to keep the light 1” above the seedlings to prevent legginess.
My old shelf
Did you ever just have to get something done and so you make compromises to finish? My old shelf was a makeshift combination of 4 unused open shelves I had lying around. I smushed them up against each other for a lovely wobbly, hard-to-access shelf system that worked. I used all the other necessary items – the heat mats, the fans, and the lights. So it was a great system that worked even if it was a bit awkward.
But I am ready to move on.
This year – I am making a new shelf specifically designed for this purpose. And I got pretty blue seed starting trays to celebrate!
The Plans
I’m using the design from Old World Garden Farms that I mentioned in my post on how to find your next woodworking project to build skills. Old World Garden Farms has a lot of great designs and now sells their DIY plans on Etsy. However, I’ve built lots of things from 2×4’s using just my imagination, so I opted not to buy the plans, but instead just figured out the design by looking at what they did.
Tip: The more you work with wood, the easier it gets.
How did it work?
Overall, my seed starting shelf is fabulous. I love it! It’s much improved over the old setup.
But it was not without its problems. What follows is a chronicle of What Not To Do When Working with Wood.
Lessons learned (or remembered as the case may be)
- 2x4s come in lengths that are not necessarily 8’ long. If you need 8’ long wood, then get 8’ long wood. So read the fine print on the sign when you buy and actually do the conversion from inches to feet. Corollary: Know your 12 times table WELL. 93-1/2” is not the same as 8’ which is 96”.
- Square your frames. I’m not going to go into it, but here is a clear explanation of how to check for square. I KNEW this, and stupidly thought, “Nah. I don’t need to square up. It’ll be fine.” So instead of having a level shelf, I’m using shims to make it not wobble. I should have taken it apart and redid the offending shelf, but it’s good enough.
- Wood is heavy. Get help when trying to move the monster shelf you are making. Don’t worry, nobody was hurt in the making of this shelf. Or at least not hurt much.
Learning Points
- If you are working with kids and want to divide up the skills: This project used:
- 8 Cuts for 4’ lengths
- 4 Cuts for 6’ lengths
- 16 Cuts for 2’ lengths
- 136 pilot holes drilled
- 136 screws screwed in
- 4 shelves painted
Measuring, cutting, drilling, and screwing. And painting. Big things can be accomplished with lots of little steps.
On Mistakes
I had some ridiculously “I should know better” moments with this project. But it turned out okay. Mistakes may sound un-Charlotte Mason-y in some ways because perhaps my seed-starting shelf was not my best work, but maybe today, it was. Because it’s done, and now I can start my seeds. So sometimes, while learning, or even doing, you can learn from those mistakes and move on without perfection.
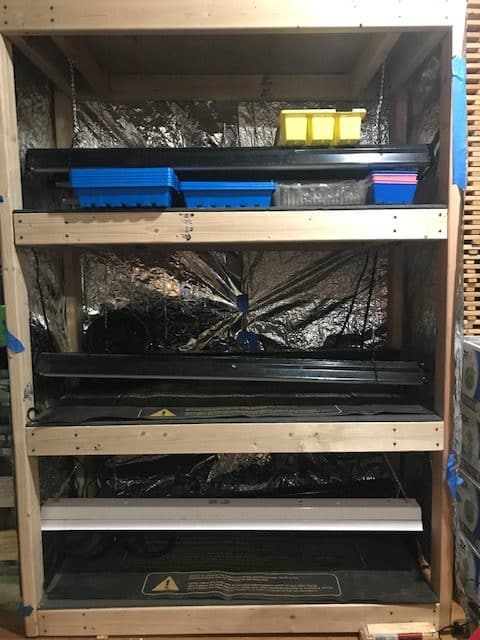
The finished product
Here are some pictures of the seed starting shelf woodworking project.


FAQ
How far apart should seed starting shelf be?
I have 3 shelves 2 feet apart. This gives me plenty of room to hang the lights and grow summer veggies until they are ready to set out in the garden.
How do you start a seed shelf?
The minimum that you need is a shelf and a hanging light. If you have ready-made shelves that you can hang your shop lights from, you should be good to plant your seeds in a seed tray. Just make sure your shelf is wide enough for your lights. Optional add-on helps include heat mats and fans – again make sure your mat fits your shelf.
How long do you leave seedlings in a seed tray?
Seedlings often take 7-10 days to emerge from the seed. Then you need to grow them until they are transplanting size – the minimum is to wait until after the first true leaf appears. But it depends on what you are growing and if you are doing a second transplant before setting out. My go-to reference book is John Jeavons’ How to Grow More Vegetables, but it is an advanced text that covers biointensive gardening. Even so, it has an approach that is incremental — it will grow with you as you learn!
What container is best to start seeds in?
I love the seed starting trays from BootStrap Farmer. I use soil blocks with my trays, but I’ve also used ordinary cell packs that I’ve cleaned & reused from the nursery. I’ve also tried coir pellets, and they are fun and easy – especially good with kids – but they usually need a transplant into a bigger container before setting out. I also like to recycle my yogurt containers or other square plastic 3”- 4” containers that I punch drainage holes in. My advice is to try whatever you have on hand or can find at your local hardware store.
Keep learning
Related articles


More
- Using grow lights for seedlings
- Tenth Acre Farms starting seeds indoors
- BootStrap Farmer for your seed-starting needs
- Old World Garden Farms