My Favorite Microgreens to Grow: Broccoli, Radish & Clover
This post adds to the original post on How to Grow Microgreens, which has a Free cheat sheet on How to Grow Microgreens.
- Winning-est Favorite Microgreens: Radish
- Super-close second Favorite Microgreens: Broccoli
- Next Runner-Up: Clover
- Not a contender: Mung Bean
Why these 3?
These three microgreens – radish, broccoli, and clover – are my personal favorites mostly because I rarely have any trouble getting a bountiful little mini-crop. In other words, I find them hard to mess up.
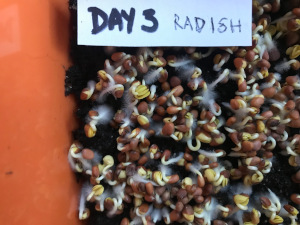
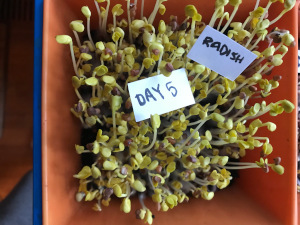
1: Radish!
Pros
- Quick grower
- Strong Flavor (which is good if you like radish)
- Really easy and consistent to grow
- Inexpensive if you buy by the 1-pound or 5-pound bag
Cons
- Strong Flavor! (if you don’t like radish)
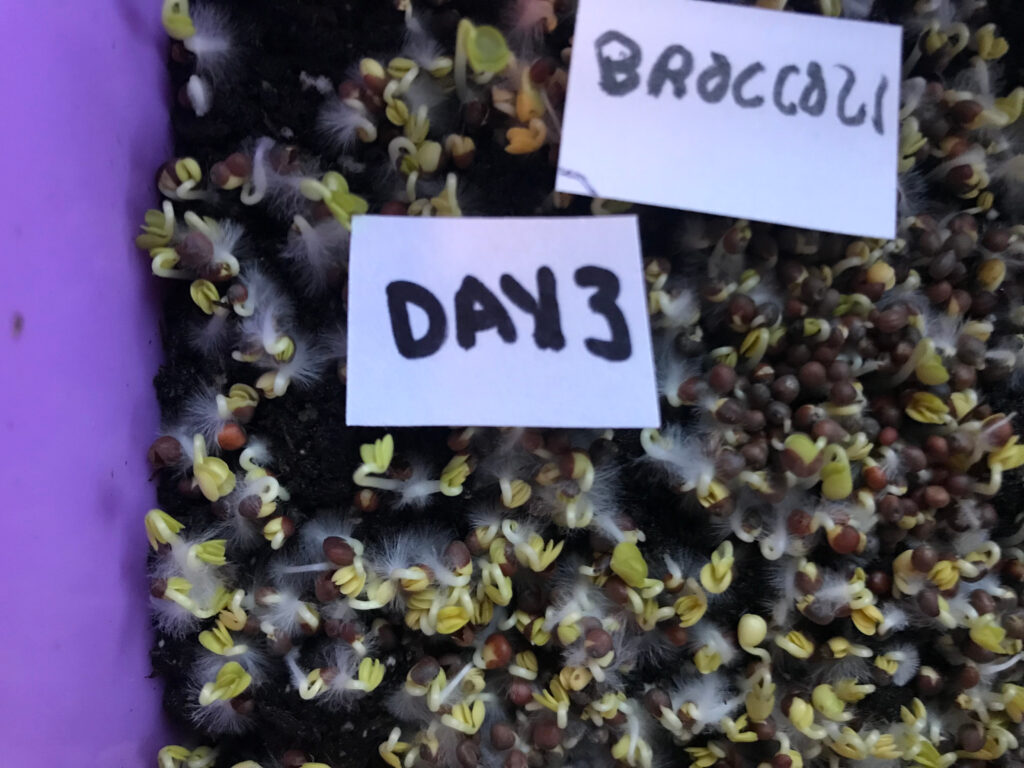
2: Broccoli Microgreens!
In my earlier post, I thought broccoli was better as sprouts rather than microgreens. But I was WRONG! Broccoli is so much better as microgreens than as sprouts. It’s too easy for sprouts to get slimy, but microgreens don’t have that problem if you grow in a bit of soil or a soil-less medium like coconut coir.
Pros
- Nutrition profile – among the best of the microgreens
- More reliable as microgreens than sprouts
- Easy to grow
- Did I mention the nutrition?
- Milder taste than radish
- Also inexpensive
Cons
- ???? Can’t think of any! Unless you don’t like the taste of broccoli. Remember – all sprouts or microgreens taste a bit like their mature versions.
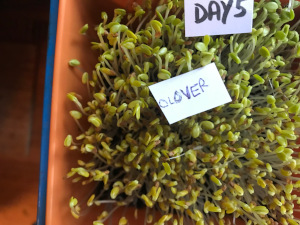
3: Clover
Pros
- Easy to grow
- You can allow them to grow for a longer time and end up with a tray of clover for St. Paddy’s Day and you can still put them in your salad
- Inexpensive
- Mild-ish taste
Cons
- The flavor is a bit reminiscent of lawn. Bunnies like clover.
Why am I talking about Microgreens again?
Well, I recently took a class in food preservation and nutrition and the subject of microgreens came up in the form of a challenge by the instructor to grow some greens before the next class.
The instructor demonstrated how easy it was to store seeds and convert them into highly nutritious fresh vegetables – often more nutritious than their mature versions.
Many in the class had never tried growing greens, though a number of us had. The challenge was slanted towards making the easiest possible learning experience – everyone got a small covered clear container and some seeds.
We were SUPPOSED to use the “paper towel” method. https://www.urbanmali.com/blogs/wisdom/paper-towel-microgreens-an-affordable-and-convenient-growing-method
But I’ve had more success with my “tiny bit of soil” method.
So here is what I did…
The “Tiny Bit of Soil” Method to Growing Microgreens
First, I have perfected my method through lots of research and trial & error (which MIGHT be called science had I written down the data!).
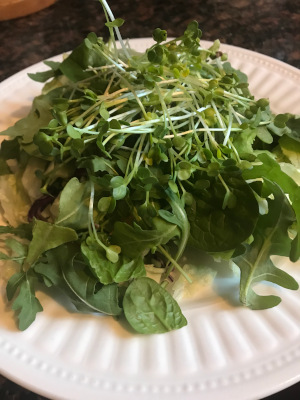
Nevertheless, I’ve invested in tools that make it easier for me to scale up my microgreens. I’m not to the point where I am making a complete salad out of the greens, but I am ready to do it. I’m pretty much constantly making microgreens to supplement our salads in the winter.
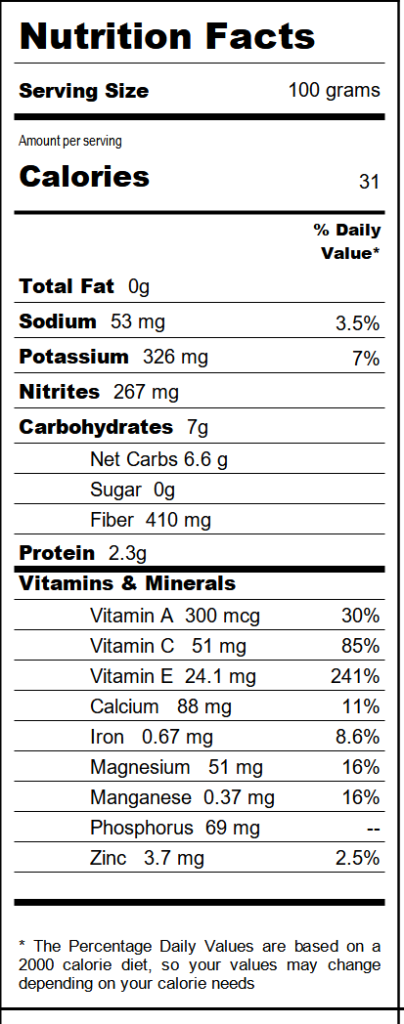
Nutrition Chart of Microgreens
Equipment & Supplies
* Disclosure: This post contains affiliate links, meaning that if you purchase after clicking through, SelfEducatingFamily will receive a small commission at no extra cost to you.
- Heavy Duty 1020 tray with NO holes | Bootstrap Farmer (the best tray ever!)
- 5 x 5 insert trays withholes | Bootstrap Farmer
- Seed: Radish, Broccoli, & Clover | Azure Standard
- Spray Mister like this one
Please Note: You do NOT need this equipment. You can use a paper towel and clear clamshell tray (like for a pint of cherry tomatoes) from your recycle bin. I use these because it is what I have for plant starts in spring. In fact, you can use any container you want. Shallow seems to work better, in my opinion.
Method
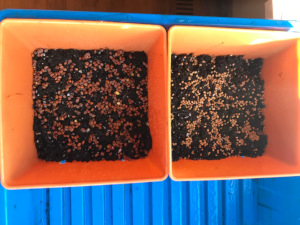
- Put a small amount of moist soil in your container – less than ½” – and tamp it down gently for a nice flat surface.
- Sprinkle seeds on the surface of the soil. A generous teaspoon – you want a single layer, very close together, almost touching.
- Tamp the seeds down so they have good surface contact with the soil.
- Spray mist water on the seeds. This is to get them off to a good start.
- Note: If you are sprouting large seeds like sunflowers or pea shoots, then pre-soaking is a good idea.
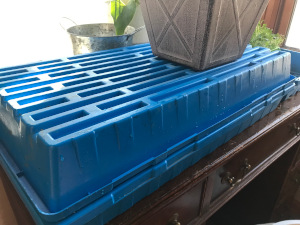
- Place the 5×5 tray in the 1020 tray.
- Cover the tray and put in a dark place for 4 days.
- Note: The sprouts should be at least 1” tall and look pale.
- Remove the cover and place the tray in the light.
- Bottom water as needed while the sprouts continue growing.
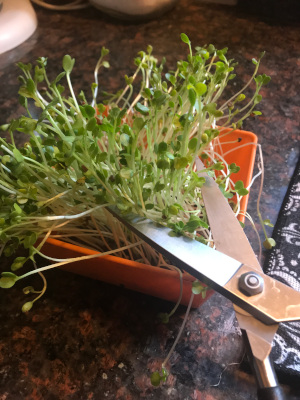
- Clip and eat at the desired height.
Details
That’s it. I’m trying to keep it simple and this method works for me. The idea of “put them in a dark cupboard” part of this method came from the book Year-Round Indoor Salad Gardening: How to Grow Nutrient-Dense, Soil-Sprouted Greens in Less Than 10 Days by Peter Burke. Great book.
I feel like this book revolutionized my microgreens routine.
One area of trouble did occur recently
I keep my greens growing in a corner windowsill. It recently got severely cold for a long stretch, getting into the negative double digits for a long streak. The corner where I keep my greens may not have gotten warm enough, and my sprouts were extremely SLOW to get going and growing.
Warmth has resumed some and the sprouts are growing again.
This was a self-correcting problem, eventually.
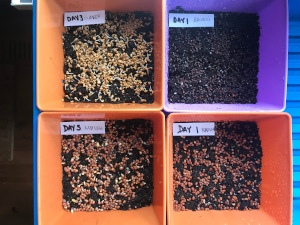
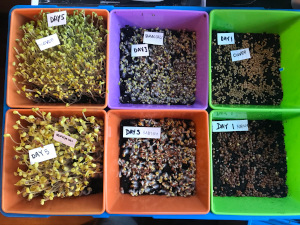
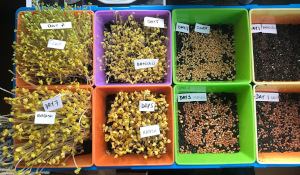
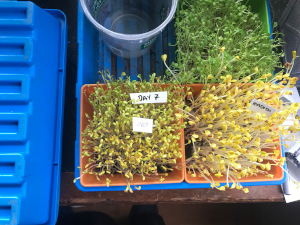
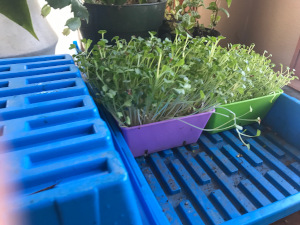
1000 Words
Here is the method in Pictures.


Resources


- All that Grows | How to Grow Broccoli Microgreens
- GroCycle | The Ultimate Guide to Broccoli Microgreens
- Clean Eating Kitchen | Broccoli Microgreens: Benefits and How to Grow
- Healthier Steps | All you Need to Know about Broccoli Microgreens
- Urban Mali | Paper Towel Method
- Home Microgreens | Broccoli Microgreens Nutrition: A Quick Guide
- Microgreens World | Broccoli Microgreens Nutrition: Ultimate Guide