What’s inside: Is cold process soap easy or fun or safe to include in your handicraft? That depends on your situation. Let’s take a look at what’s involved for making cold process soap.
This post may contain affiliate links. If you find my content valuable and make a purchase through one of my links, I will earn a commission at no cost to you, which helps me keep this blog going so I can help you even more! I recommend products I trust and/or use myself, and all opinions I express are my own. Read the full disclaimer here.
Additionally, this post is not offering advice nor safety recommendations. You, the parent, take full responsibility for you and your children’s safety. This post is about my experience while making soap.
First, Find an Expert
I set out to find out how easy or safe making traditional cold process soap was – you know, the process that doesn’t use much heat, but uses LYE! I know enough from Chemistry to know that lye is caustic. So I kind of was always afraid of trying soap making.
My husband actually makes hot process soap, which cures much faster – 2 days as opposed to 2 months. And in general, cold process makes the prettier soaps. But he doesn’t care about that; he’s more concerned with just making soap. And he was a Chemical Engineer, so I felt that he knew what he was doing more than me. I feared soap making out of my reach.
But when several of my homeschooling mom friends mentioned casually that they make soap and it wasn’t hard, I decided to follow up on an offer to join in for a soap making session.
My friend Michelle has been making soap for years and she offered to teach me. Michelle blogs at What Don’t I Do? And since she is so capable, I thought she could be my expert.
An expert is good when learning something you are uncomfortable with that could go wrong in a big way if you’re not careful.
Quick Fast-forward to the Conclusion
The session went well and we made soap. She made it look extremely easy, and she showed where it was important to take care.
I wanted to get that out of the way to let you know that everything was fine and no one had to be rushed to the hospital.
Now that that is out of the way, let’s get into what I learned.
What goes into soap?
Traditional Soap is made from fats or oils and an alkali solution like lye. The key chemical process is called saponification. The lye (which is basic on the PH scale) reacts with the oils (which are acidic) and breaks down them into soap and glycerol. By the end of saponification, the individual fats and lye are no longer present. It’s why the soap can be used on the skin – because the lye is gone.
Michelle told me that lye used to be made from wood ash – which I had heard before but never really thought about. Turns out, they would pour water over wood ash collected in a barrel with holes in the bottom until they had a liquid that was “wood ash lye” and was strong enough to float an egg. That’s how they knew that the lye was ready to neutralize the oils via the saponification process.
We used sodium hydroxide and made a solution of it.
CAUTION: WARNING!!!
Never add water to acid – it causes a violent exothermic reaction and can splash acid out of your container!
The saying is “Always add acid to water, never water to acid.” And the cute memory trick is “Do as you oughta, add acid to water.”
Do as you oughta, add acid to water.
Clever Mnemonic to avoid burns
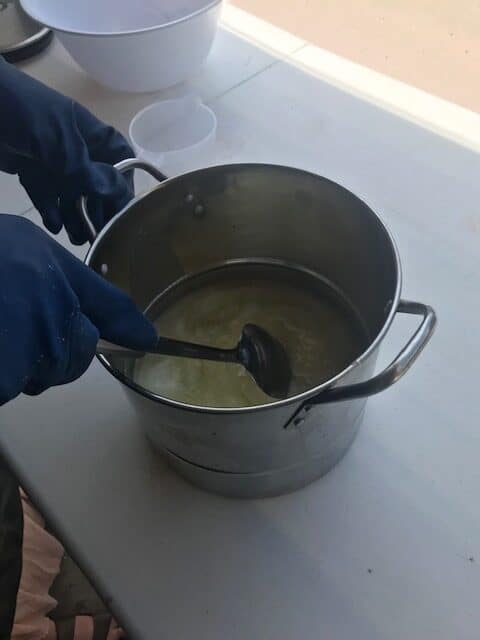
More cautions: Always have a well-ventilated area as the fumes from the lye solution can burn your throat if you inhale. Also wear protective gear like a big rubberized apron, gloves, and eye protection. And you have to dedicate equipment that you aren’t going to cook food in.
We worked in the garage right by the open garage door.
What is Cold Process Soap?
Cold process soap combines the soap making ingredients with very little heat. You have to melt your fats into a liquid state and then let them cool. That’s the only applied heat you need.
The process itself generates heat, but we aren’t counting that.
We used a combination of fats and it was a hot day. So the fats didn’t need extra melting. We used tallow, coconut oil and olive oil. Just stirring them together liquefied the lumps out.
The process is simple: melt your fats, add your add-ins, then add your lye solution. Stir until it gets “trace”. Then put it in a mold for 24 hours. Cut and set aside for 2 months.
That’s it.
But I’m getting a bit ahead of myself…
The Recipe
We followed one of Michelle’s favorite recipes from Natural Soapmaking Book for Beginners called “Tried and True” Soap.
Because she has tried this recipe many times. And found it true.
The fun thing about Cold Process Soap making is that each batch can be totally different depending on what you add in. So Michelle is always adding in something for fun. She’s currently testing Bergamot blends but hasn’t found what she’s looking for yet.
Scents are a minimum to add – I’d say they are ESSENTIAL! Little joke there, because you use essential oils for scents.
The other major thing she adds is a clay. That’s for color. I didn’t know clays came in so many colors.
Why soapmaking?
I asked Michelle why she started learning soap making and she gave me the same reason I started keeping chickens – because you can control the ingredients.
With chickens, for me it was dietary restrictions – I was eliminating soy and corn from my diet and in order to eat eggs, I needed soy-free, corn-free chickens. It was easier (cheaper) to just raise chickens and control what they eat.
With soaps, yes, you can find many nice soaps nowadays that don’t put in bad-for-you-chemicals and endocrine disruptors that are typically found in store-bought soaps. Like sodium lauryl sulfate, parabens, triclosan, phthalates, formaldehyde, propylene glycol, PEG compounds, and not to mention artificial dyes and parfums.
But even now, after being able to find naturally made and handmade soaps on the market, Michelle found that they were so expensive, it was easier (and more fun) to continue to make her own soap.
And she loves giving them as gifts. She’ll make up a special batch for an occasion to share with her family and friends. And who doesn’t love a well-crafted homemade gift?
How did the session go?
We ended up doing two sessions. We mixed up the first batch using Orange, Cinnamon, and Vanilla essential oils and a green clay. It looked good and came to trace easily.
Trace is when the mixture starts to emulsify and will leave a “trace” on the surface if you drip it off of your mixing tool. If you’re familiar with whipping egg whites, it’s similar to “peaks” – soft peaks or stiff peaks. Soap, when it’s emulsified, will start to leave a light trace to medium to strong trace.
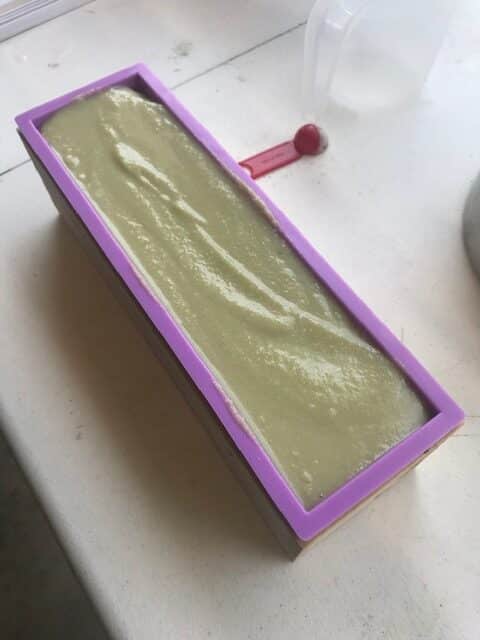
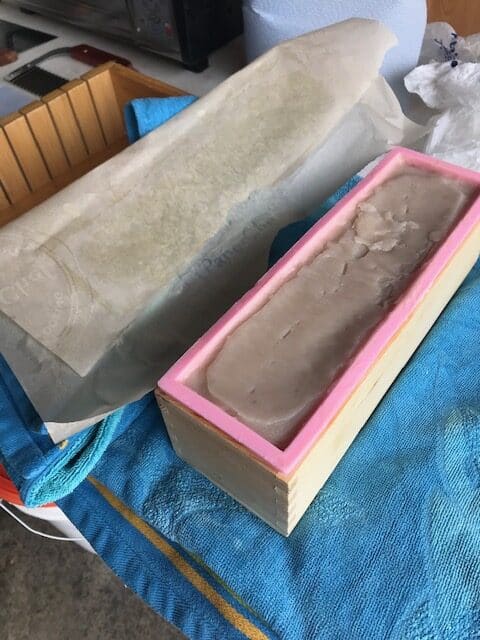
So we put it in a rectangular-shaped silicon mold, wrapped it up in a towel and set it on a shelf to cure overnight before cutting the next day.
Well apparently, just after I left, Michelle noticed that the towel was leaking! She unwrapped it and it was separating! Apparently, it was too hot and too fast and didn’t actually set up correctly. She thinks the combination of high ambient temperature and using cinnamon oil (which can add heat) might have done us in.
I am required to tell you at this point in the story, that this has NEVER happened to Michelle in all her years of making soap. She was mortified. It’s like baking a cake for a special occasion that you’ve made dozens of times, but 5 minutes before people arrive, it collapses in the oven.
Rescued the soap
Michelle actually rescued the first batch by remixing with her stick blender. But the scent was a bit off. It still will work like soap.
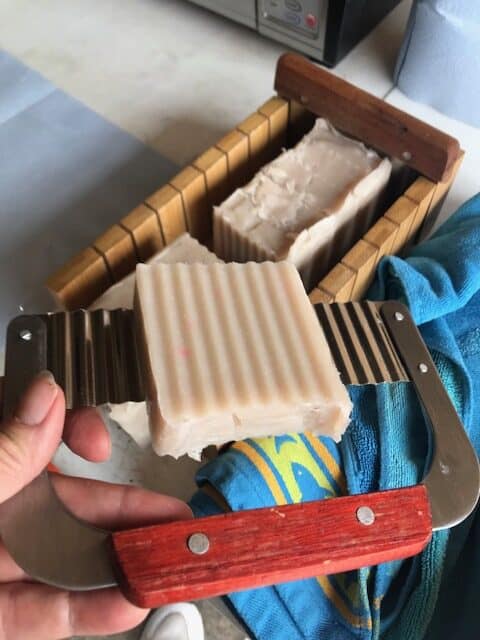
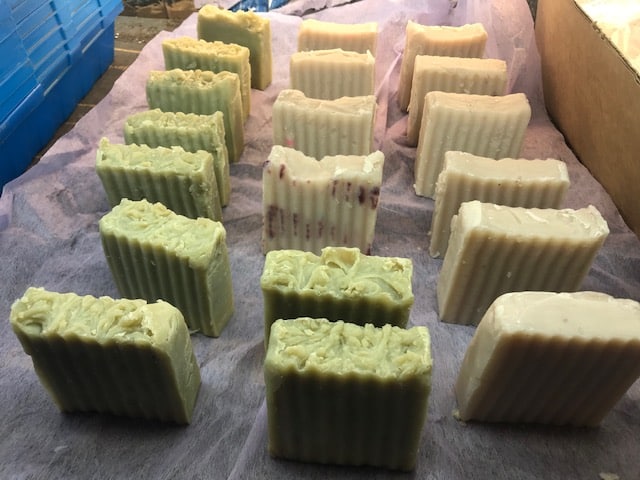
So I returned the next day, cut that loaf of soap, and then made a second batch. This time we tried Lavender, Tea Tree, and Peppermint with a pale purple clay. It set up beautifully. We used the same recipe for both batches which called for a mix of oils: tallow, coconut, and olive.
These soap bars will be delightful when they are fully cured.
After you slice them, they sit on a shelf for 2 months with some air circulation as they do the final curing – moisture leaves the soap a bit. The bars are a bit squishy after coming out of the mold, but they will harden as they cure.
Would I do it with kids?
Ah, here is the crux of the matter! Would I use lye with my kids nearby?
Well, I never did, and they aren’t kids anymore. However, I would make cold process soap with them now!
I would have done it if they were old enough to handle it. But remember, I haven’t actually made soap by myself yet.
This is a question you have to decide in your family. One mom I know (not Michelle) had done hot process soap for a number of years but never wanted to include the kids when they were young. I never followed up if they have been involved since then.
As with any “dangerous” craft, use your judgment and teach the safety rules. And keep on learning!