What’s inside: A look at what it takes to do Upholstery for Handicraft. We’ll look at some considerations and some ideas for different levels of abilities. Are your kids ready to take on the challenge?
This post may contain affiliate links. If you find my content valuable and make a purchase through one of my links, I will earn a commission at no cost to you, which helps me keep this blog going so I can help you even more! I recommend products I trust and/or use myself, and all opinions I express are my own. Read the full disclaimer here.
Handicraft: Upholstery is Like a Puzzle
Have you considered doing upholstery for handicraft? This is a more advanced type of craft to try, suitable for someone mature enough to handle some power tools, have medium-level machine sewing skills, and maybe someone good at puzzles.
My Background
I took some basic high school sewing classes, enough to be able to follow patterns for sewing a 4-piece women’s business suit ensemble. In fact, one of my goals was to take all of the available classes in home economics – mostly because that meant advanced eating throughout the day with the extra cooking classes – I think I had a much faster metabolism then.
When I had taken all of the sewing classes that were available, my teacher suggested doing a special “senior project” class where you make up your own curriculum and project. We selected slip covering an over-sized swivel chair. Great class. I think I wanted to learn upholstery because my dad had done it and never taught me.
The success in the class taught me how to approach a slipcovering/upholstery project. With slipcovers, you have to make your own patterns using LARGE paper and tracing what exists on the piece of furniture. Then, you sew piping (the cording or welting that frames the piece), cut and sew it all together.
I skipped a few steps there where you check your measurements a lot.
In upholstery, it’s even more fun because you basically deconstruct the furniture, clean up & repair the framing and springs, rebuild the piece, then staple and sew the new cover on.
That’s why I said it’s like a puzzle – you take it apart and then put it back together.
I like upholstery because the sewing part of it feels more forgiving than sewing clothing. My clothing always seemed to come out unevenly. But if it’s a couch, you can just tuck that little mistake into the crevice.
What skills do you need to begin learning upholstery?
At a minimum, you need to be familiar with measuring. And cutting fabric.
There are some projects you can do without sewing, like simple chair make-overs where you disassemble the chair, recover the seat, then put the chair back together. For this beginner-level kind of project, you should be comfortable with tools like screwdrivers, pry bars, hammers and some power tools, like drills and staple guns.
If you have serious mid-level machine sewing skills and want a challenge, start with a slipcover.
General Principles
For upholstering, you basically take your project (like a chair or in my case, an ottoman). Then you put it back together.
Sounds easy!
Here is the single most important tip to make it successful:
- As you take apart your item, take FANTASTIC notes on how you did it.
What kind of notes?
When I started upholstering, people did not carry a computer/camera in their pocket. So I do rely heavily on a notebook.
For each and every step, no matter how small, document it.
- Describe what you are trying to do in a list or numbered list method.
- Take photos.
- Draw pictures.
- Label everything – every piece of fabric you remove, every corner that it came from.
You are basically creating a recipe for how you took the item apart in order to put it back together in reverse order.
Every piece of fabric that you remove will be the pattern for the new fabric.
No matter how small I think a step is, inevitably I will have to break it into smaller steps.
Like any “take apart project”, if you want to put it back together, then take good notes, label all of your pieces if appropriate, keep your hardware in a small Tupperware or container so you can find it again later, and keep organized during the process.
Examples
Let me give you an example.
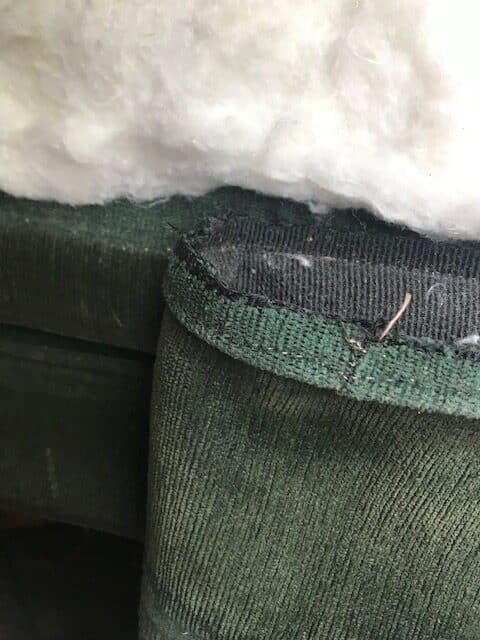
On my latest project, the ottoman, one of the first steps I could see had to happen was “Remove Band and piping.” It’s step 3A in my notes.
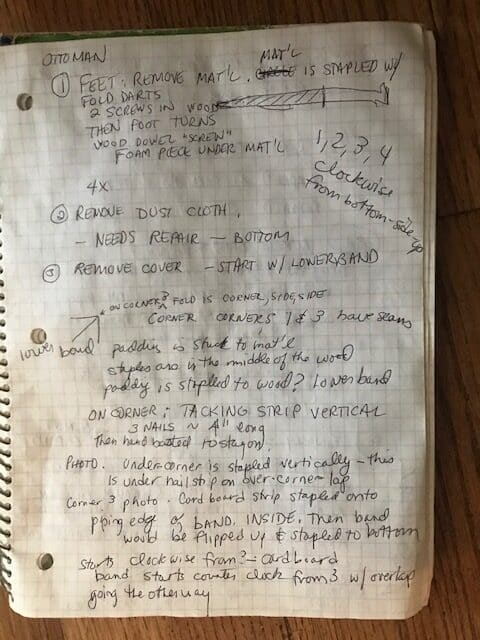
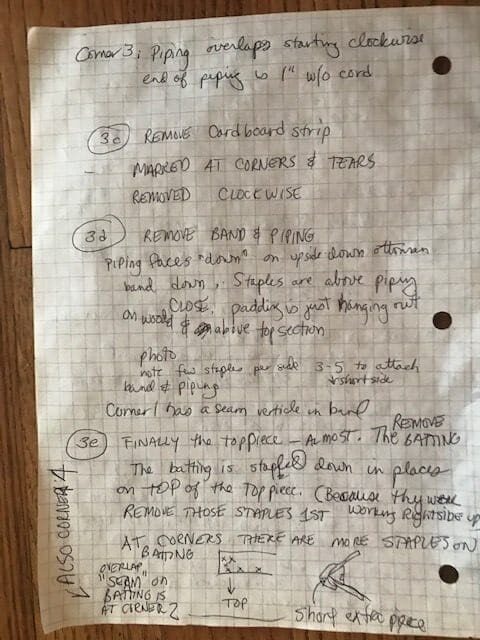
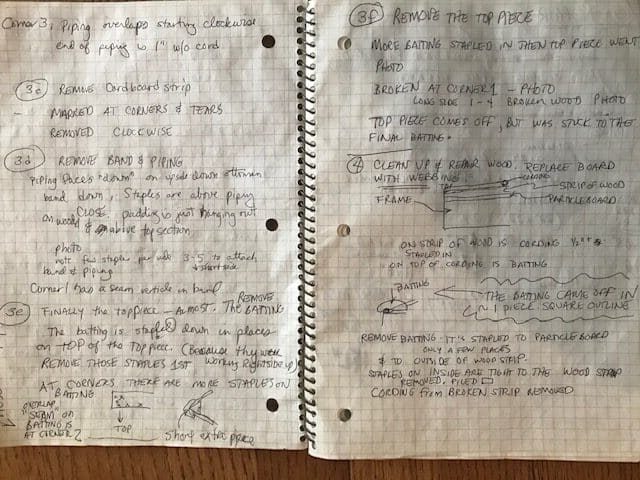
My notes are extensive and legible to me since I’m the only one who has to understand them.
As soon as I opened up one end of the lower band fabric, I could see it was layered with cushioning. So now I have to “Remove staples from bottom of ottoman.” Then I can “Remove lower cushioning.” Next, I can “Remove staples from piping on lower band.” Then I can “Remove more cushioning.” And finally “Remove Lower band and piping.”
And there are often surprises.
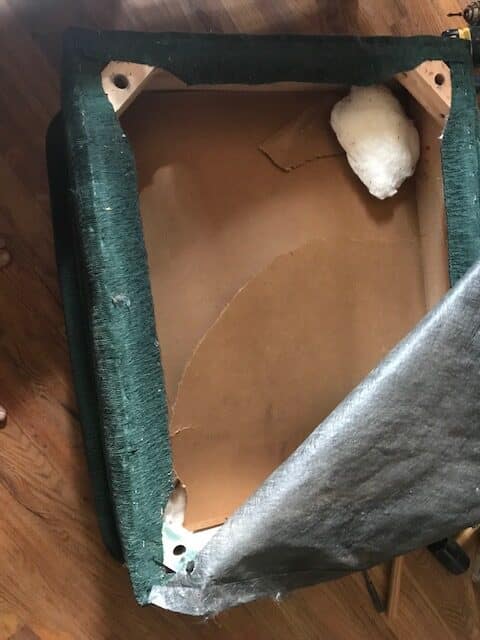
Another early step on my ottoman project was to “Remove Dust Cover” – that’s the black, lightweight fabric found under most pieces of furniture. It should be straightforward – remove the staples and take off the fabric.
And it was straightforward. Except for what I found under the fabric! The ottoman structure was completely broken.
We know what that means.
REPAIRS! SURPRISE!
So the project just doubled the amount of time it would take.
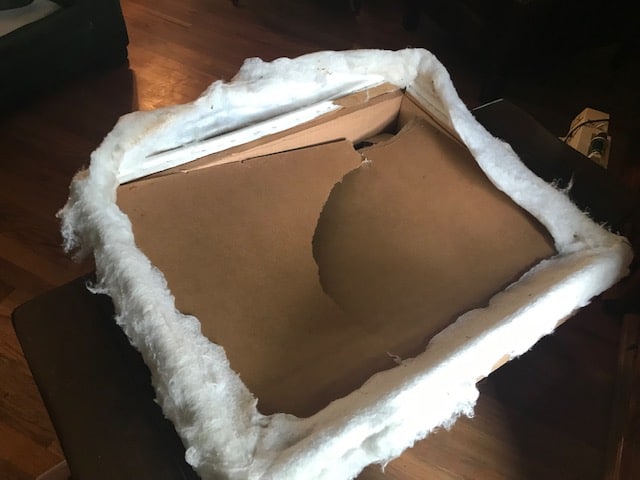
In fact, that was what changed the project from a slipcover job to an upholstering project. I knew that I would need to remove the whole upper cushion anyway in order to repair the ottoman, so I might as well just refresh the whole thing with new upholstering.
Great first projects
If you want to venture into slipcovering and upholstering, I’ve gathered a few ideas for you – some easier starting projects, along with some useful resources.
Easiest Beginner Projects
- Pillow cover with piping. Great for learning to sew piping. And this project is simple and very forgiving. Pillows are completely soft – no real internal structure – so it is usually ok if it isn’t exactly perfect. Amanda Marie at Simply Marie Designs has an easy tutorial for a pillow, but she doesn’t cut the piping on the bias, which is a better practice.
- Outdoor Chair Cushion Cover. These are always in need of a new cover after a season or two. Be sure to use weather proof outdoor fabrics for these. They can be super easy or more complicated – like the kind with double piping on the top and bottom. Heather’s Handmade Life has a nice makeover of cushions.
- Chair seat. I’ve taken apart an office chair seat and recovered it for a covered porch use. It’s an easy, no sew project that is good for practicing with staple guns. Erin Zubot Design offers a good step-by-step.
- A footstool. These often include refinishing or painting the wood legs, as well as putting on new fabric. Some footstools also involve decorative tacks or edging, which is a skill in itself. My Repurposed Life shows how to do this.
Next Level Projects
- Dining Room Chair slipcovers. I’ve never tried this because I have wood chairs that I don’t want to cover, but lots of people love this look. She Holds Dearly has a good tutorial.
- Slipcovering an armchair. With this project, you begin to use more skills. Sewing in particular. She Holds Dearly also has a nice tutorial for slipcovering a recliner.
- Window seat. This can be more of a “build it yourself and then make a cushion for it” type of project. I’ve made a kitchen window seat by putting a wall cabinet on the floor under a window and then upholstering a cushion on top of it. Kitchen cabinets are structurally built so they can hold up to someone sitting on them if they are attached to the studs in the wall. They make a nice storage base for a seat by the window.
- Upholstering a simple storage ottoman. Some people even build these from scratch. Or you can find an old one from the thrift store and change it into something beautiful. This project is often no-sew. Kim’s Upholstery has some great videos and articles with step-by-step.
Getting Started
Here’s my go to book for reference:
Tools I use:
- Porter-Cable Upholstery Stapler
- I also have an electric stapler and regular non-electric manual staple gun, but the manual one is very tiring on my wrists.
- C.S. Osborne Bronze Head Magnetic Tack Hammer
- I love this. I’ve had mine for more than 20 years. It’s a must-have tool if you are using upholstery tacks.
- I also use a regular claw-back hammer for both pulling nails and hammering them back in.
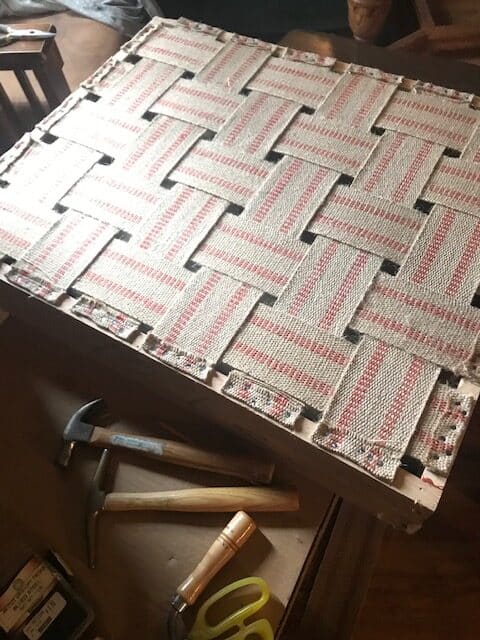
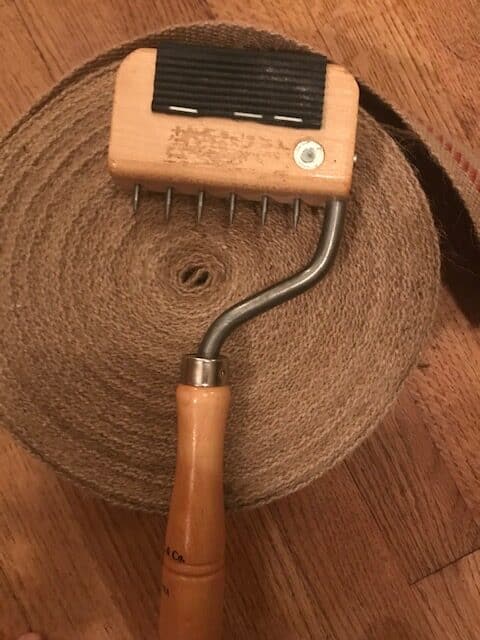
- C.S. Osborne Gooseneck Webbing Stretcher
- Essential if you are installing webbing.
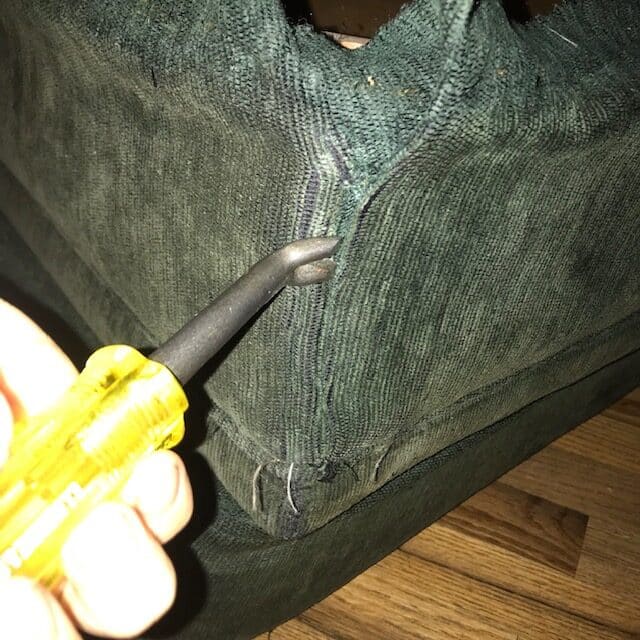
- Claw-shaped Tack remover
- This isn’t the one I have, but I can’t find my 30 year-old tool online. It’s yellow handled. But the one I linked to looks like it will work. I also use small screwdrivers.
- Rubber Mallet
- Useful for installing decorative tacks so you don’t ruin them.
Did you get any ideas?
I hope this inspires you to think about the possibilities of the many projects you can do with upholstery. Good luck.